The tripod I use broke a couple of years after I bought it. I think i dropped the tripod, or it fell over, I can't remember. I didn't want to throw it away and I must have just built my first 3D printer, so I modelled and printed a new part for it. A while later another clamp on the tripod failed, so I modelled that (it was a different size) and fixed that problem.
Recently I had started to notice that one replaced clamp was a bit loose. Of course, I carried on using the tripod until the part failed, which is did a few days ago.
The broken part is here:
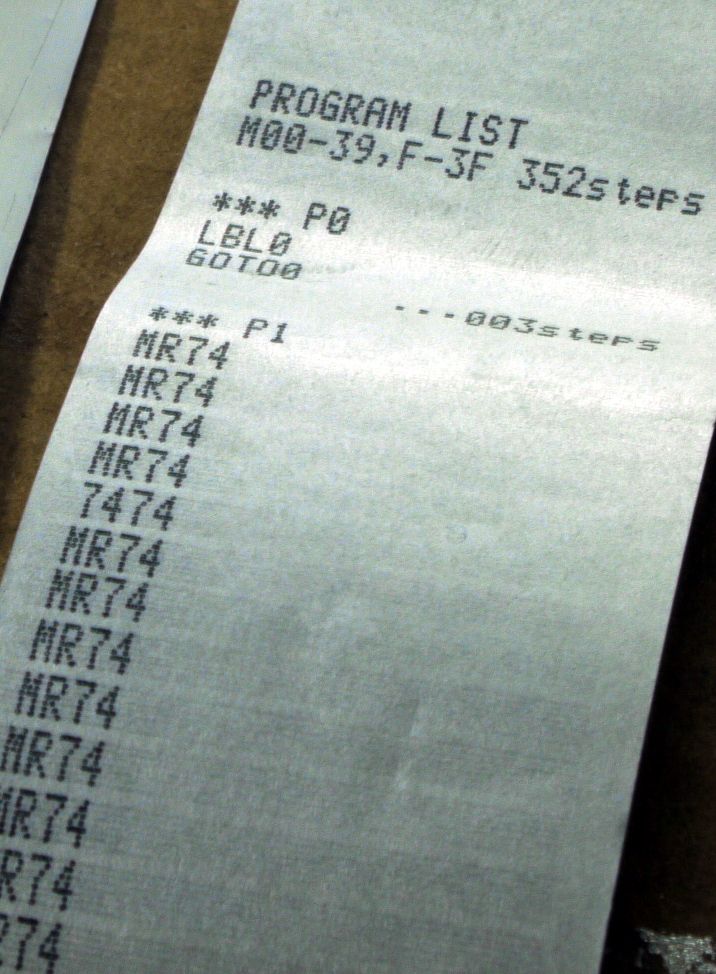
I think this was printed on my Mendel, but however I did it it looks like I was using very little infill at the time. You can see here
that there's none, really.
I printed the new part at a higher infill figure (50%) and also at a layer height of 0.1mm rather than 0.2mm. This leads to a denser part that hopefully will last a bit longer than the original.
Ever since the 80's I've wanted to build a Z80 computer. I even bought the chips, but never used them. The reasons for this are varied. I never liked erasing and reprogramming EPROMs. My EPROM eraser died. I didn't have the money to make a PCB, or the software (or red and blue tape and a lightbox). In the 90's I did make a 6502 computer which was done with loads of wires on veroboard. Then the Arduinos came along and I didn't really need a Z80 computer as much.
I still wanted one though.
Then, in a flash, the scratch to my itch appeared: Why not make a Z80 computer with flash memory? Well, fine, but how do you program the flash memory? Aha! Why not use an Arduino to take over the bus and program the flash chip?
That should work, and once I had the idea of an Arduino to program the flash, it didn't take too long to think about using an Arduino to drive the Z80 clock and bus signals and provide flash data directly itself. This allows you to run the Z80 using the Arduino and read all the bus signals. You can single step your code at the resolution of a half T state (one clock transition). Once you are happy with your code, it can be burnt into flash. Once there, you can remove the debugger Arduino and use the board as a stand alone computer.
Of course, without IO and hardware bits attached to it, a computer like this isn't very interesting. So I added a couple of Z80 PIOs and the footprint for an Arduino shield. So you can plug shields in to the board and use whatever is on them. So you have a Z80 Arduino. Programmed in Z80 assembly (or C, or whatever you can get running on a Z80).
PCB manufacture is a lot cheaper these days so I had a few PCBs made up.
The board looks like this:
It is technically an Arduino shield as it plugs into the top of a Mega. It is also an Arduino itself, as shields (Uno format) plug into it. You run it either under Mega control where the Mega clocks the Z80 and emulates flash (the RAM is switched in as the mega runs the Z80, so you have 32K of RAM, more than the Mega can supply). Or you run it at 4.5MHz from the real hardware (with the Mega plugged in or not).
The specs aren't too bad either, there's 32K of SRAM and 512K of flash. The flash is bank switched, but needs a small piece of code in each bank at the reset vector. The Z80 runs at 4.5MHz.
The two PIOs have 32 GPIOs, each of which is bit addressable as input or output. I also put a Z80 CTC on there for timing things. This PCB uses through hole components apart from the flash chip, a 3V3 regulator and an A/D converter. There's some surface mount capacitors too. It's pretty easy to build, but does come out larger than an Uno, or Mega.
The mega plugs in underneath:
The shield plugs in on top:
Under the shield there's an A/D converter that provides the analogue channels when operating as an Arduino. There's also a 3V3 regulator, just in case:
There's various test code in the sketch. This code writes to the LCD on the LCD/button shield:
I've got a script that embeds Z80 .lst file output into the Arduino sketch so you don't have to manually edit the file, you assemble it then run the script and it's put into your sketch which you then compile.
I've written a terminal emulator script that lets you upload .ihx files that have been built using the Z88SDK C compiler. The terminal emulator also has a register dump facility. This uses a small piece of code that is executed between each instruction when the Z80 is being clocked by the Mega. This code dumps the register contents in a non-disruptive way and the data is picked up by the terminal emulator and displayed.
This is very much a work in progress, but that's part of the fun isn't it?
The files are here on github, there's all the code and the PCB files. I use geda.
I use Panasonic GF1 and GF3 cameras for stills and video. I use the 20mm lens that came with a GF1 and also a selection of Pentax lenses and micro four thirds adapters. The 20mm is an auto focus lens, but all of the others are manual focus. This is fine in the workshop when shooting video or taking macro shots of bits and pieces, but when out and about it's a lot more convenient using auto focus. I've been looking for a zoom lens for the cameras for weeks. they are quite expensive, probably because they can be used on a wide range of cameras. Not wanting to spend much money on the lens, I waited until a broken one came up for sale that I thought I had a chance of fixing.
The lens I bought had probably been dropped and the mounting flanges had broken off. I removed the part that was broken:
I tried the most sensible route to a fix: try to buy spare parts. As usual, they aren't available. I was told that my best course of action was to have the lens serviced at an authorised service centre. I suspect this would have cost more than I paid for all of the GF cameras and lenses put together.
So, instead of this I decided to have a go at making the part myself. I have a 3D printer and this is a plastic part...
Here's one of the prototypes I made along the way:
Did it work? Well, yes it did. In fact the first two photos in this blog entry were taken with the previously broken lens.
This photo wasn't, for obvious reasons:
I do get a few lens attachment errors ( I think the contacts need to be moved up a bit), and I lost a screw (not technically lost I suppose, I know where it is: somewhere in the workshop), I have only aligned two of the four mounting screws and I have to drill a few holes by hand, but it does work.
Auto focus and everything.
It works as it is, but I'll probably improve it to remove the annoying lens attachment warning. Just because it isn't perfect doesn't mean it won't do the job.
A Vinyl Cutter that Works with Linux
In the UK we have a well known crafting store. I have a look around now and again and buy a few things there. One of the things I always look at is a range of vinyl cutters that are sold there. They look very useful, and the 3020 CNC can't cut paper very well. I have the Can transformer for thin sheet metal, but the inability to cut paper and card was irking me.
I had a try at using drag knives on the CNC3020, but whatever I tried just didn't work. I now know that was probably due to the lack of a sticky sheet for the work piece (lack of research on my part I think) and maybe insufficient knife pressure.
After walking past the insect based cutter again, I decided to see if it could be attached to Linux. After a lot of hunting about on the web, I came to the conclusion that it probably was just about possible but that it wasn't a sure thing. Then I decided to research vinyl cutters. Then things looked up. I bought one of these:
It's a Smurf. Presumably because it has blue cheeks. I bought it here. It's great. It's about the same price as the other cutters, it can cut A3, it is a trade rated build, not hobby so is sturdy and it does work with Linux. The interfaces that it has are USB to serial, RS232 and a USB connector for a memory stick. Oh, and it comes with a pen holder so you can use it as a plotter as well. It was supplied with an A3 sticky mat and cables. There's a menu driven control panel on the top of the machine, a power panel at one end and an IO panel at the other:
There's good, bad and neutral news here. Good news is that I have tried the USB to serial and it works, as long as you send the file a certain way. There's bad news: I haven't managed to get the USB memory stick interface to work, but it turns out that I was formatting the stick wrong. The neutral news is that I haven't tried the RS232 at all.
The memory stick requires all files to be in the root directory of a FAT-formatted stick. I think it also requires the file names to have the PLT (or plt, I'm not sure) file extension. I've not tried it since I got the USB to serial working.
The protocol used is either HPGL or DM-PL. I use HPGL and a script that I wrote to send the files as there were a wrinkle or two when sending files straight to the cutter. I'm not sure what was happening but I suspect it was to do with auto detection of the protocol that was being used and buffering. I have a script on my github here. It's a basic script but it works for me. There's a terminal emulator so you can drive the cutter manually if you want to.
My work flow is a bit convoluted, but I found that InkScape can generate HPGL files that work with the cutter, so I use that to export files either from Inkscape itself or from files imported from LibreCAD.
The cutter has an ARMS auto contour mode, but I haven't managed to find any protocol for it, or really understand what it is. It looks like it's an auto registration feature for pre-printed material. It seems to need host help so without the protocol that isn't going to be available.
Thursday, 12 December 2019
MK-52 Calculator
The MK-52 is a Russian calculator that is interesting for a number of reasons. Being Russian, it has Russian manuals and Russian keys. This is a bit of a problem for me as I don't speak Russian. I find it difficult to remember the key markings and what they relate to on the keyboard. So, I thought it would be worth having a go at creating some English keys for the MK-52, just to make using it more comfortable.
My first idea was to machine the keys out of plastic and engrave the legends into the top of the key. This could then be filled with a coloured material and there you go. After some research I found that nylon has a high enough melting point that I could maybe machine a set of keys from it and then fill the engraving with polymer clay and then cure that at 105C. Hopefully the nylon will stand up to that treatment and the polymer clay will be robust enough if it is cured and recessed into the key.
Setting all this up is a bit tricky as the parts have features on all sides and work holding and work order is complicated. So, as a trial I had a go at 3D printing the keys. This actually turned out fairly well. I have printed in PLA, so polymer clay may not work, but I have a couple of keys that I've printed and engraved with legends. I then used a pencil to colour the engraving, rather than use polymer clay.
The result is a bilingual MK-52:
The two white keys have English legends. Here's a close up:
The engraving is a bit wonky, that's just the setup I used. this was just a trial and I was more concerned about the engraving. Engraving PLA is not easy, but after a few passes at different depths and RPM I managed to get pretty good 2mm high text. This is about 0.5mm deep which is OK for the pencil colouring, but for polymer clay more depth might be needed so more material is in the keytop.
I tried using the keys after I put them back in the calculator and they seem to work fine. The pin on the back that presses into the membrane mechanism is a bit shorter on the 3D printed part, but that doesn't seem to affect operation at all.
I also had a look at getting some keys 3D printed by Shapeways. I hoped that they'd do full colour printing but they don't, a single colour is all that they do, and that comes out at $6 per key. This makes it too expensive to consider, I think, which is a bit of a shame.
Holding the keys is a problem on the engraver, then I had a thought. The keys were held perfectly well on the 3D printer, why not use the print bed on the engraver?
On the Fisher the print bed is sort of circular and removable. So, I tried that and it worked:
I managed to engrave a set of 13 keys, albeit a bit off centre.
I've used an amalgam of English wording that I found on the internet. I've had to change the letters so that there's a maximum of three per key, as four doesn't fit with the text size I've chosen.
There's a problem using polymer clay with PLA: it requires too high a temperature to cure. Instead, I tried air-dry clay. I got some white and used it to fill the engraving, so there's a contrast between the letters and the button. I also tried a mould-able glue product (Sugru).
These are some of my attempts, together with an original button on the right.
The air dry clay has worked best I think, as it doesn't colour as much from dust when I sand and polish the top. Maybe if I left the mould-able glue to cure longer than 24 hours then it wouldn't pick up so much dust. The dust gives the letters an off-white colour that isn't as nice as the whiter finish of the clay.
I polish the tops of the keys which gives them a nice shiny finish. The sides are still the normal 3D printer layer finish. The bottom with the 2mm cylinder that pushes the key is a bit of an untidy mess.
I've decided to print the keys with a hole in the base and fit a length of 2.5mm styrene rod there instead of trying to print the feature. You can see the lower side of one of the keys here:
Printing this part has the advantage that it's flat on the bottom and sticks well, and the keytop is at the top of the part which means it has a nice finish which polished well and also doesn't suffer from the gaps that the first layer of a print seems to have. These gaps filled with white clay and created a pattern of thin lines on the top. You can also see a finished key in the above photo and also several keys that have had clay applied and are drying before I sand and polish the top surface.
I then made a full set of keys (well, the Russian ones, I left the original number and function keys) and fitted them in the MK-52:
These are air dry clay filled except for the R/W and ADR keys, they are filled with paint. I've also used some 2.5mm diameter styrene rod for the part of the keys that pushes on the membrane. I glued the rods in a hole that is printed on the bottom of the keys.
This is very much a trial, so we'll see how well they work.
You can see the keys working in this video:
Here's a short timelapse of the keys being engraved. You can see that one of them popped off as the tool came down to touch it. The fixing method isn't perfect! I could always engrave more keys and get some redundant ones for this sort of mishap. I engraved a block of keys like this several times and that key always fell off. At least it's consistent.
Saturday, 7 December 2019
Magic Metal Paper
In the seventies, Casio created the FP-10 printer for the fx-602p.
It could also be used on other calculators like the fx-502p and fx-702p. Like the ZX Spectrum printer it was a spark printer that used metallised paper. This paper is no longer available, at least anywhere I can find. I managed to get a printer for a reasonable price, and it came with one roll of paper. The paper appears to be a layer of metal at the front (aluminium I assume), then a black layer of some kind and then a paper backing. The rolls are very narrow and only a couple of metres or so long. I only have one roll of paper so I decided to see if I could make some paper to use on the printer.
I measured the paper and got a figure of around 3 to 6 ohms per square (very rough measure).
That's a printout from an fx502p, which doesn't ordinarily have any real alphanumeric capability, but the printout does. The printout is very clear.
Attempt One
Aluminium foil. I tried aluminium foil in the printer. This didn't work as the foil doesn't have the physical strength to get driven through the mechanism.
Attempt Two
Stiffen it up. I glued foil to paper to try to give it a bit of stiffness. This also didn't work. The foil tore and I suspect there was no electrical contact between the foil and the metal plate at the front that forms a circuit between the paper and the electronics.
Attempt Three
Try to find conductive paint to spray on some paper. There are conductive paints but they are very very expensive and I didn't try those. I also inquired about silver spray paint that looked like it was conductive. There's no metal in it apparently and it is not conductive.
Attempt Four
I find that there is a conductive paper available. It's called 'teledeltos' and it is used for science experiments and I believe was also used in fax machines many years ago. I bought some (not cheap) and it arrived as a large roll. It appears to be totally unsuitable as it is carbon based and the conductive side of the paper is the wrong side to work in the printer. The resistance of this paper is probably too high anyway at 2000-3000 ohms.
The black side is conductive, but you'd want to print on the white, non conductive side to get contrast. I tried scraping some of the white off so there's contact with the metal plate on the front of the printer, but no sparks at all.
Attempt Five
I tried shiny aluminiumized paper based on a plastic sheet backing. This was conductive on one side but again wouldn't print.
Attempt Six
This involved aluminium 'gilding' foil. This is very thin foil that you can glue to paper (or other surfaces). It results in a shiny silvery effect. I used spray glue to attach the foil to paper as it will not adhere on it's own.
When I measured the gilded paper I got a figure around 0-1 ohms so this is much more in the ball park of the original paper. When I cut strips and ran them through the printer, there were some sparks, but not enough to get a printout.
I'm not sure why not as the resistance seems similar to the original paper. The texture is different though, with the original paper a grey matt surface and the gilded paper much shinier.
Here's a selection of papers that I tried:
That's gilded paper on the left, shiny aluminiumized paper in the middle and the magic original paper on the right.
I also cut some original paper at a shallow angle so the layers become more apparent:
You can see the backing layer of paper, then a black layer and finally the aluminium on top. The black provides a contrast after the metal has been sparked away, I think.
Conclusion
There must be some magic employed in the original paper. It's not just that it is conductive, as none of these conductive 'papers' worked at all. The things I can think of are maybe:
The resistance of the paper is critical to operation. None of the resistances were exactly what the original paper showed, either much higher or slightly lower.
The texture of the paper is important. The original paper has a distinctive matt finish. If you scratch it with your fingernail then you get a metallic shine, so there's aluminium there.
The thickness of the paper is critical. I doubt the papers I made are exactly the same thickness as the original.
The printer has been finely tuned to print on just the original paper. maybe it can be re-tuned to print on other 'papers'.
I'm not sure what to do next. I may have a look inside the printer and see if there's some clues in there.
Thursday, 5 December 2019
Canon Selphy 740 Fix
I recently bought a canon Selphy photo printer in a charity shop. It was cheap and seemed like a good source of parts if it didn't work and an interesting colour printer if it did (although the paper and ink cartridges are expensive).
It didn't work.
I took it apart and at first sight couldn't see much wrong with it. It was very clean and in very good shape. One odd thing was that I couldn't get the printer ink (or film, to be more accurate, this printer doesn't use ink, more on that later) cartridge out of the printer. Even when dismantled, I couldn't get it out by springing catches open and so on. I then noticed that there was a small electric motor which didn't have any gear on it's spindle. That can't be right. Then I noticed a rattle as I turned the printer over and then out popped a small gear. It was exactly the correct size to drive the larger gear next to the motor spindle. You can just about see the small crack in the gear that caused it to fall off the spindle in this photo:
For some idea of scale, that's a 1.5mm hole in the centre of the gear.
The first thing I do with these fixes is try to get a real part, but I've only managed that once in the past, most manufacturers won't or don't sell spare parts. That was the case here. So it was either fix the gear or make a new one. I've not had much luck in fixing these gears in the past, so I decided to make one.
I created a script that generates Gcode for this gear (it's parametric so I can use it for other gears too), and set my CNC machine off to make a new gear.
The cutter is a 0.2mm D bit that I ground the end off to make it more closely match the profile of the gear. It's not perfect but it works.
I used a surplus stylus that I got with a TFT display, as the stock for the gear. It's a bit soft and if it fails I'll look at another material, perhaps.
You can see the profile of the gear I cut here, together with the real part:
You can see that it's not a perfect match, if I need to then I can cut a better one.
Here it is in position in the printer:
The new gear fixed the printer, it can now print:
This printer uses film, not ink, as I mentioned before. There's a yellow, a cyan and a magenta block of pigment on the tape that is in the cartridge, one set per photo to be printed. The printer goes through four printing cycles but I've only found three pigments on the tape, I'm not sure what the fourth stage is. Anyway, I noticed that the used tape had a reverse image in each colour on the tape. You can see part of an image here:
These correspond to the pigment that is left in the cartridge after an image has been printed. This means that you can rewind the cartridge, put it in the printer and, if you print a totally black image, print a colour negative version of the photos that were printed by the printer. That can then be scanned or photographed and colour reversed in software.
Thursday, 21 November 2019
More 3D Printing Usefulness
A colleague has a clothes dryer that came with two feet used to attach it over bath. The feet sit over the side of the bath and the other side of the A frame design sits next to the wall. This is fine if you have only one side to load up with clothes, but if you want to spin it round 180 degrees and load the other side then there's no feet on the side that is now on the edge of the bath. The dryer has the holes for the other two feet, they just weren't supplied.
A foot:
There's a screw that fixes the foot to the frame, there's four holes for feet, only two feet. The screw is countersunk so it doesn't damage the surface the foot rest on.
An OpenSCAD model later and we have prototype one:
This was fine, except that I'd left out the countersinking of the screw and the screw hole was too big.
Prototype two has the countersinking.
I printed two of the latest version and so far it looks like they do the job.
Thursday, 12 September 2019
Pen Set and Boxes
What's in the crate?
Well, there's two boxes. A big one:
...and a smaller one:
And what's in the boxes?
Well, the smaller one has some bottles of ink:
The larger one has a set of pens and pencils. There's a fountain pen, a ballpoint pen and a pencil. All from Beaufort Ink.
Under the pen stand there is storage for the bits and bobs that go with pens and pencils.
The bits and bobs are housed in machined aluminium tubes with caps made from the same acrylic that the pens are made from.
Cartridges:
Ballpoint refills:
Pencil leads:
Sunday, 8 September 2019
Commodore S61,N60 and M55 Connections
After opening up many old calculators and finding battery leakage has eaten wires and tracks, I thought I'd put up photos of a Commodore S61 (the same internals as the N60 and M55) calculator. Hopefully if anyone needs battery connection positions, this will help.
I've also added some more shots of the PCB just for the record.
This photo shows where the battery connects:
This is the entire PCB. The white taped thing on the right is my battery pack.
Here's the front of each of the three machines in the series: