Search This Blog

Monday, 18 February 2019

Screwdriver Test and Stand

I've had the odd small screwdriver set, but never been very impressed with the quality. I have been taking watches apart recently and finally got totally hacked off with the rubbish screwdrivers. So, I decided to throw some money at the problem and buy some expensive screwdrivers to see if they were worth it.
I've bought a cheap set of watchmakers screwdrivers and the quality was a bit better, but still not nice to just handle and use.

So, a large-ish bill later and I was the owner of a selection of screwdrivers from a variety of manufacturers: Bergeon, AF, and some Cousins ones. they are all pretty nice, and do indeed have that 'nice to handle' quality.

Anyway, I had nothing to hold them while working, I could have bought a stand, but my wallet was tired, so I decided to make one. Some 3D modelling and printing and ta da:


Can you spot the screwdriver that cost £37?  Hint: the price includes a barrel.

The stand is made from two parts and uses a 608 bearing to join the two parts:


The screwdrivers themselves seemed to come in two basic sizes, with two diameters of the end of the handles. So, the holes in the top part also come in two different sizes to match:


The screwdrivers are held by the handles, the bits sit in a cone shaped recess in the top.

One thing it needs is a heavier base. I think I may have a go at machining a metal base so that the insertion and removal of drivers is a true one-handled operation.

Friday, 15 February 2019

A 3D Printer is a Ruler

What is a 3D printer for? Well, it can do things that are difficult to do other ways, or would take a long time. This morning I was looking at fitting drawer fronts to a table. I needed to hold the drawer front with a fixed gap around the edges so that there was a uniform clearance. I had a quick think and knocked up some wooden shims using the bandsaw. They were OK, but then I found that the gap at the bottom of the drawer front was a bit different to the sides. So I needed a couple more. So I made some more on the bandsaw. Then I found I needed two more to make the front stable while shimming it up. OK, off to the 3D printer. Some SCAD later (10mins or so):

//
// Marking aid for table shelf runners
//
//

// 25mm height for runners

if (0)
{
difference()
{
cube([40, 10, 30], center=true);
    translate([0, 2.55, 30.2/2-25/2])
cube([45, 5, 25], center=true);
}

}

// shim to keep distance consistent when attaching sides to drawer front
if(1)
{
    ov = 7;
    th = 3.5/2;
    th =1;
    d= 100/2-ov/2+th;

difference()
{
cube([20, 7, 30], center=true);
    translate([0, d, 30.2/2-25/2])
cube([25, 100, 25], center=true);
}

}


Quick and dirty. Note the shim distance of 3.5/2. That's tricky on the bandsaw, or in wood at all. Not a problem on the 3D printer.
A bit of printing later (two printers now, so simultaneously on both) and we have shims:


The two different sizes look like this when they are resting:


Of course, you can do other things. Also printed this morning were two pin vice holders:

(The sharpie holder was done weeks ago).


Friday, 8 February 2019

First Hair Cut

It was the time for the first hair cut for the little one, and being a squirrel type person that doesn't throw much away until it has been used a couple of times, it seemed a bit wasteful to just throw the hair cutting away. After all, we won't have hair from the first hair cut again.

Then I came across this page:

https://allabout-japan.com/en/article/3553/

It seemed a good idea to keep the hair and attempt to make a brush with it sometime. Then I came across this site:

http://www.beyondcalligraphy.com/calligraphy_brush_hairs.html

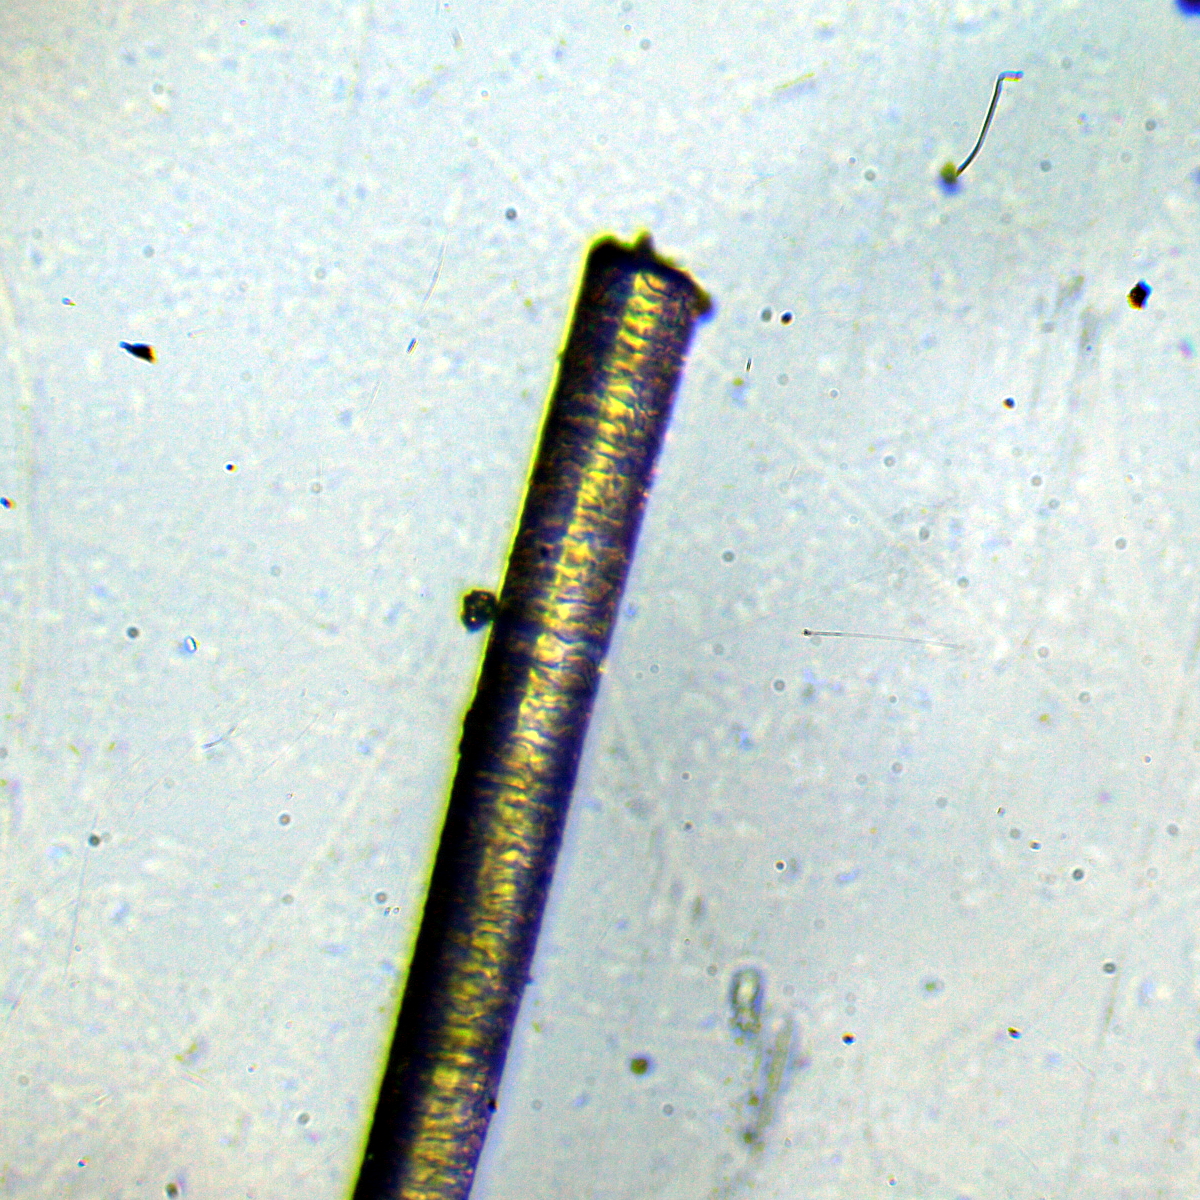
which mentions that human hair brushes is only made from the hair of babies. The hair I had collected is just such hair. "What was the reason for this?" I thought. Off to the microscope to have a look at a hair.

This is the cut end at 10x:


You can see the flat chopped off end, and also some features that look like growth rings. This is a less clear higher (20x) magnification view:


A view at 40x:

The uncut end, which is the first part of the hair that grew looks like this (also at 20x):


This end is much thinner and doesn't have a sharp cutoff. This makes it much finer for brushmaking, I assume, and may be why this is used rather than other, later, cuts.

Thursday, 7 February 2019

Crazy Paving Shelf

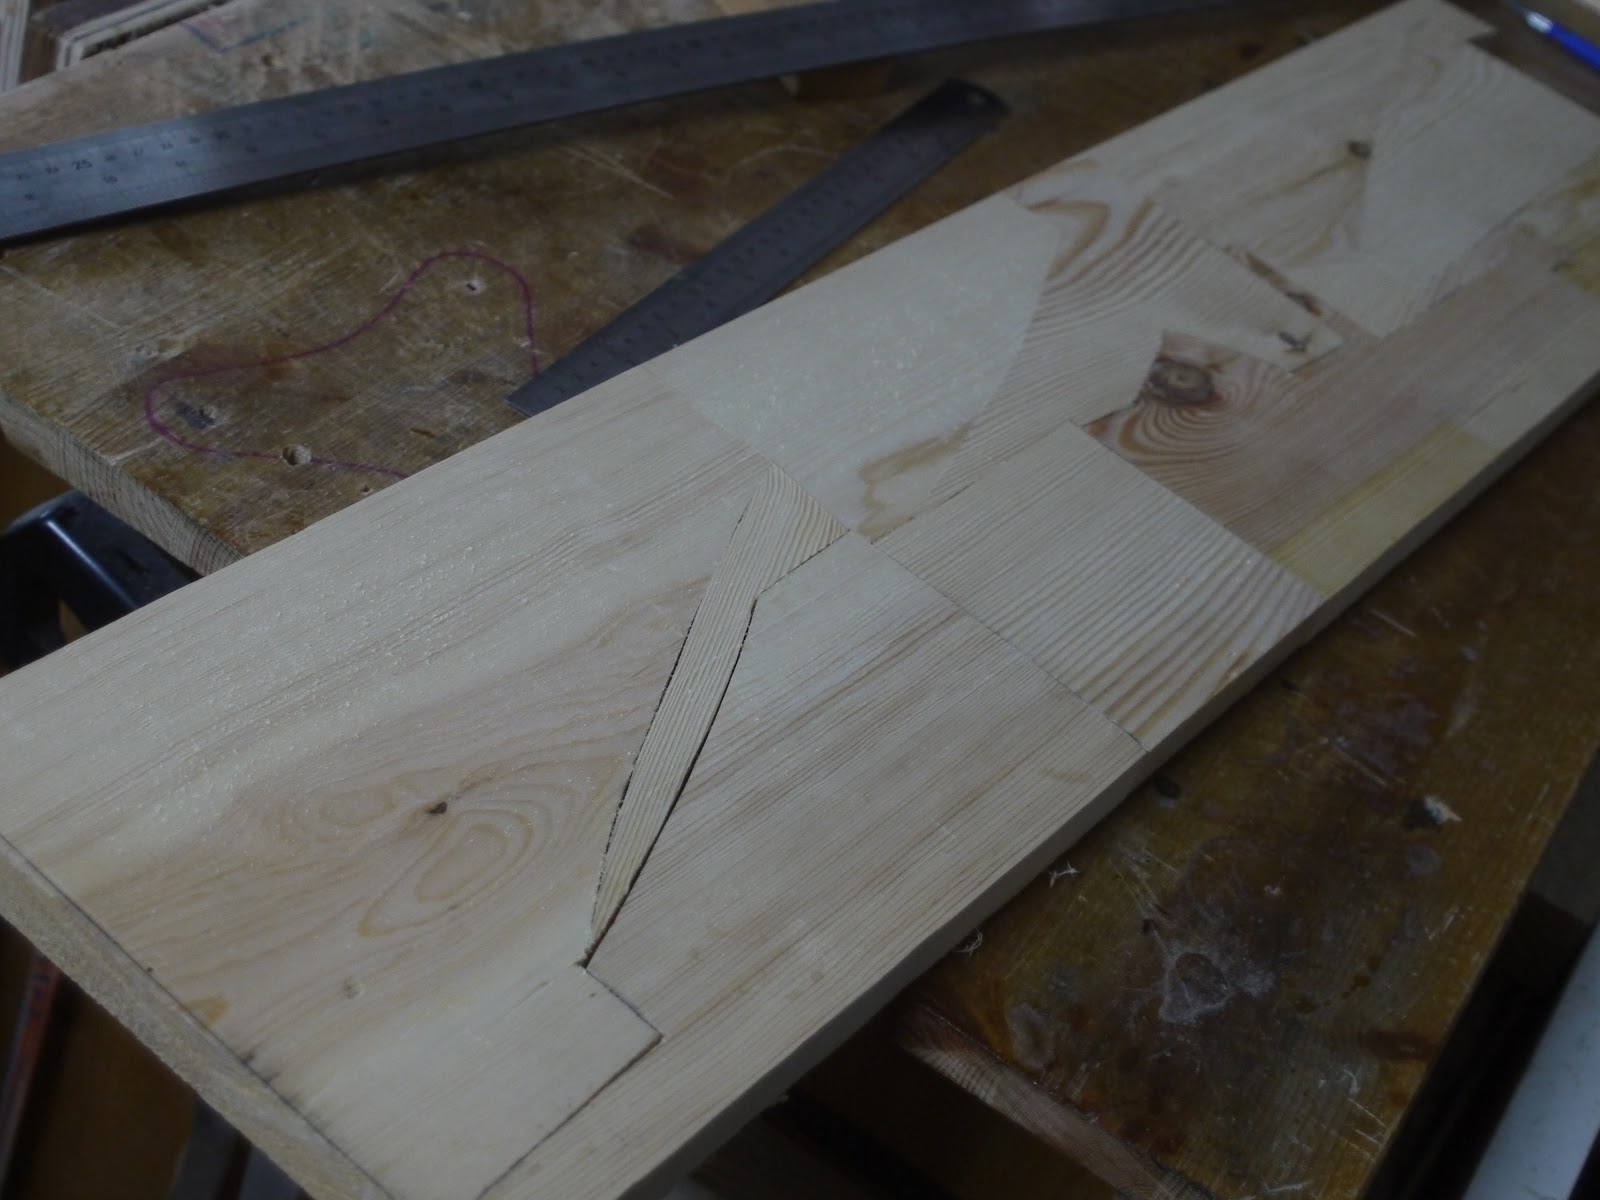
One of the advantages of having a few tools around is that you can do things quicker than with just hand tools. Example: I wanted to make a shelf, but rather than cut a large piece of wood down, I joined small offcuts I had lying around into a larger plank. This was pretty easy using the band saw, tracing the shape needed from one piece to a piece below it. I then biscuit jointed where possible to provide more strength. Everything was then glued together.

After gluing, I ran it through the thicknesser to get everything flat then cut to size with the band saw again.

The glued shelf:


I then filled gaps with a mixture of PVA glue and  sawdust from the band saw. Once dry it was sanded thoroughly.

This all took time, but not that much. I managed to use offcuts that I would have probably eventually burnt. I'm going to try this again on more shelves I need to put up. Hopefully it will clear some space that the offcuts are taking up.


Wednesday, 30 January 2019

Chocolate and Orange Hot Cross Buns vs Dualit Toaster


Toasters toast things, but when the things contain chocolate then they also melt things. This is fine if you eat chocolate infused thingies (I don't), but unfortunately when chocolate melts it also tends to escape. This happened in our Dualit toaster recently when some chocolate escaped onto the prongs that lift the toast up and down.

A quick cleaning attempt and I found that it was tricky cleaning those prongs as they are down in the toasting slots. No problem, I thought, I'll take the toaster apart and give it a good clean. Being a Dualit it is made to be repaired so should be easy to dismantle. A bit later and I found that yes, you can take bits off, but not all of them. Irritatingly the bits that need to come off to free the prongs have been pop-riveted into place. This meant that I'd have to modify the toaster to get the prongs out.

So modify it I did.

The pop rivets:


were drilled out and replaced with  bolts:


 This makes it a lot more fiddly putting the bits back together, but at least now I can get the prongs:


 out (and back).

 All cleaned and re-assembled:


I think I'm going to investigate threaded inserts for the two bolts I added (and maybe some others that are a pain to fit) and try fitting them the next time I do a deep clean.


Thursday, 17 January 2019

A New Hat? For an Owl

A coworker brought this in recently. It's an owl that hides a tape measure.


The end of the tape had a bent piece of metal pressed onto the end. This eventually fell off:


I made a new end out of machined brass sheet. It's a clamp and some small M1.6 bolts clamp the end onto the tape:


 Another property of the end, apart from just being on the end, is that it is a fixed distance from the marking on the tape so it needs to be pretty accurately at the 0cm point at the end of the brass. tape measures aren't massively accurate as the tape stretches and so on, but the new end is pretty close:


The other job (perhaps it's main job, really) of the end is to stop the tape from disappearing into the body of the owl when it is fully wound in. This it does well, probably better than the original:


Is that a hat? I'm not sure what owl's have on their heads, probably nothing. I thought about making it in a hat shape, but that wouldn't have worked well as an end for measuring, so I went with a flat end.

It's interesting how complicated something like this can be when you try to make another one. It's off to the long term test of use now...


Friday, 11 January 2019

Really? That's How It's Made?

These data switches were being scrapped:


One is a Centronics printer switch and the other is a 25 way D type switch:


 I opened them up to see if there was anything salvageable inside and what I found was unbelievable. The connections between the switch and the connectors is done using discrete wiring.


I was expecting a PCB or maybe two, perhaps linked with a ribbon cable. PCBs were more expensive back when these switches were around, but the amount of labour needed to make these connections must have been considerable and, let's face it, PCBs were designed to replace this sort of thing.

It does appear to be hand soldered as there's evidence of melted connector plastic here and there:


These switches must have been tested before being shipped, and I suppose making a test rig to do that is pretty easy as all the connections come out to the connectors, but if you found a fault then it's off to the wiring to try to fix it. With a PCB it would have to be a PCB track fault of some sort which would be a PCB replacement or maybe fix. So surely fixing faults would be harder too?
It's a world away from a USB hub...

Here's a video examination of the switches: