Search This Blog

Showing posts with label woodwork. Show all posts

Wednesday, 27 February 2019

Third Generation

Due to some selective forgetting, I had ignored some requirements for the second generation tongs. I think what I had done was to focus on the request that the next generation be slimmer and had forgotten that it should also be shorter. A few minutes with the bandsaw and the second generation tong became a third generation, and shorter:


Feedback from the second generation was that the smaller 'teeth' on the end:


weren't as good as the first generation:


So, I added teeth to the third generation that matched the second:


Another requirement that I had forgotten, but remembered once I had been reminded, was to have a clamp of some kind that could be used to hold things in the tongs without having to apply pressure for long periods of time. I had a think about this and was wondering about a hook arrangement, or levers of some kind. The clamp has to take into account different thicknesses of material to be clamped and allow tightening of some kind. Lever and hooks and so on were getting complicated. then i thought about doing this:


This is a rectangular 3D printed clamp that slides towards the end of the tongs as you clamp. As there is something in the tongs to clamp, the tong arms are at an angle so the clamp ring has a tightening action as you slide it up:


I then realised that you can use the clamp ring as a stop for the tong arms, so the leather stop can be removed. Excellent, the design is getting simpler.


Then, to stop the ring from dropping off the arms, I made a little home for it using a pair of recesses cut into the arms:


The ring was a bit big and probably wouldn't clamp thin items well, so I printed two more, successively smaller, rings and finally got one that will clamp down to a mall gap at the end of the tongs:
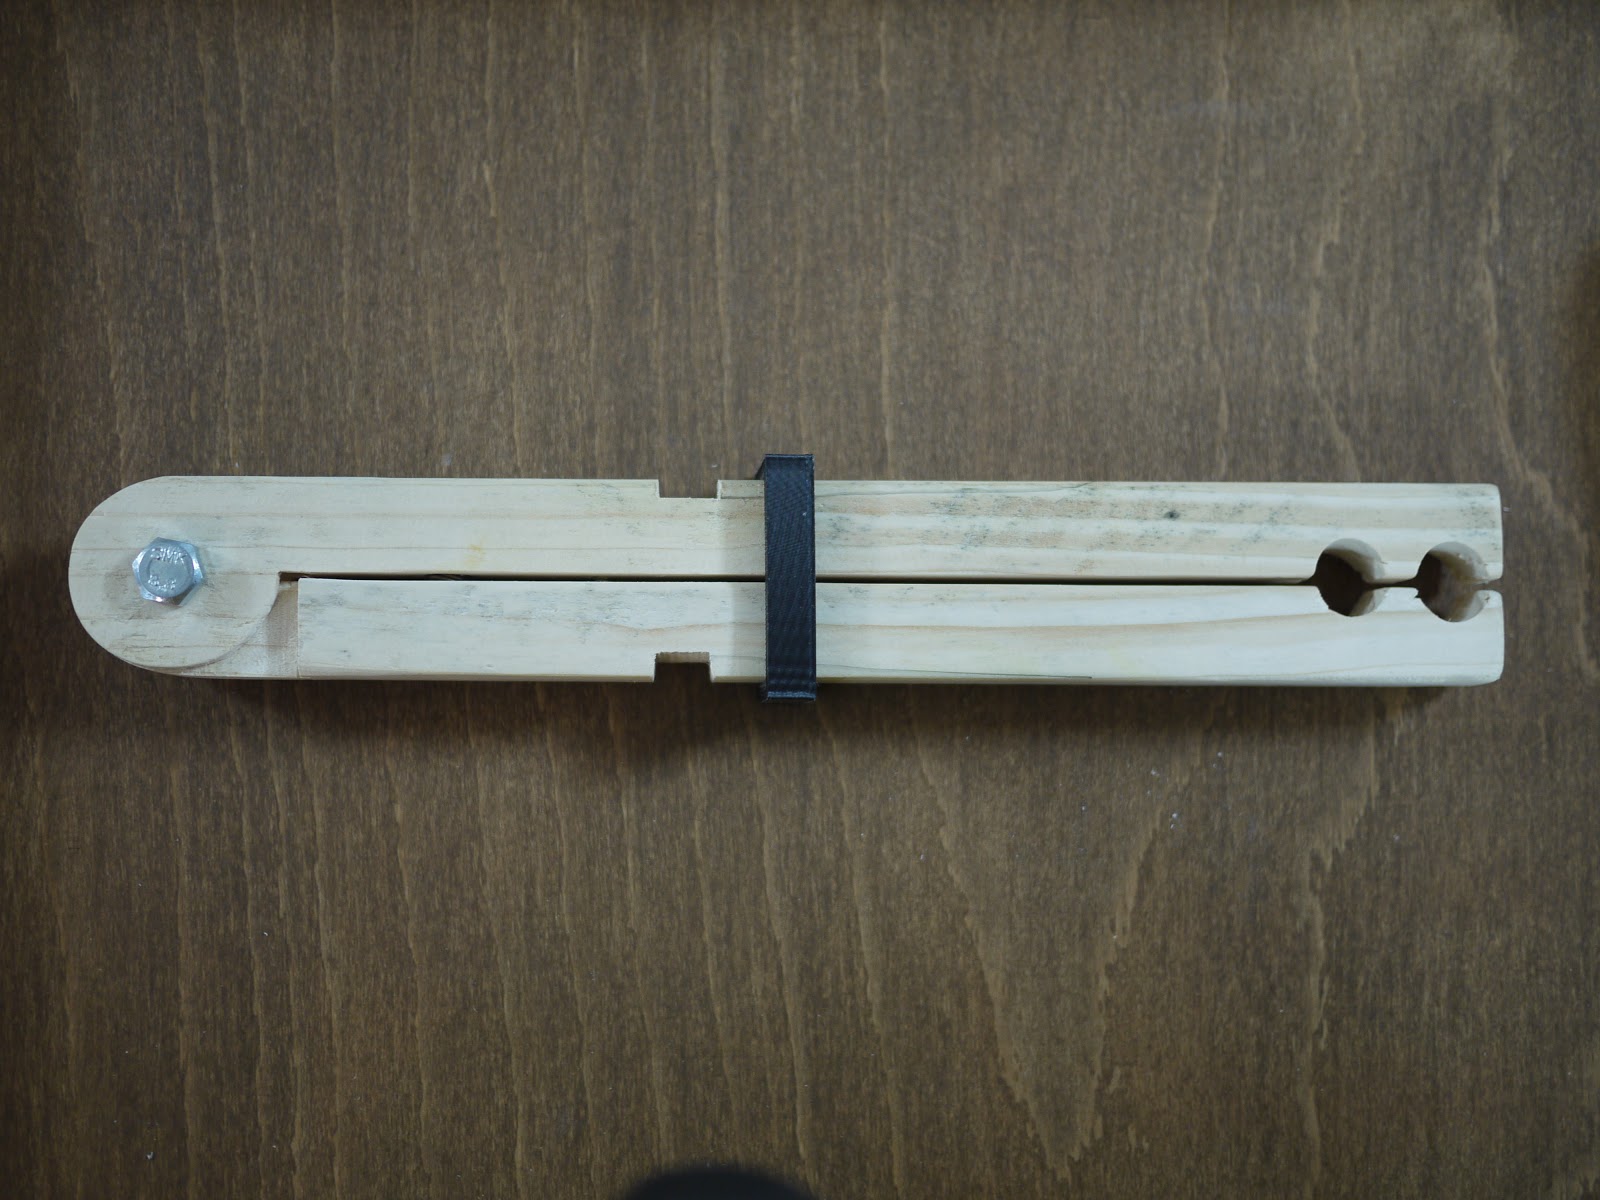

Because the ring was now smaller it was difficult to get it to leave home as the recesses had square sides. A bit of sanding and I had given one side of the recess a slope. This also allows clamping to be applied gradually, rather than the instant application needed when slipping the ring over the square edge.


This is the third generation in the closed position.


Actually, is this the third generation, or the fifth generation?

Tuesday, 25 September 2018

Tally Board


Well, I'm not sure what it is called, really, but as you can tally with it I think it's a tally board. Counting square? Anyway I made it many days ago and it has been used for a bit then left for a longer while. I decided to package it up.

I've done a short video of the finished board here:


It's a square with a lot of holes in it for peg things. The peg things were from a glitter pen set I think, I didn't make them. So it's a re-use project too.


So you can keep track of things with it. Count things. I made it originally to save the pegs from the bin, I don't like throwing away things that look like they are useful.So I made a board to hold them in. The board I originally made had a 7x7 grid and the holes had a diameter that was a miniscule, tiny bit too small for the pegs, so it didn't feel nice putting them in the holes.
I reprinted the boardwith an 8x8 grid, which just feels nicer.
There's also a single hole board, for special counts:


I used this set once for counting swearing. The big board was for normal words, each rox for a different word, or maybe a differen tperson, I alternated. Then for very very good (or bad) swear words, one utterance and the peg goes in the single hole board and you have won the game.


When I remade the boards I printed them with a small increase in diameter and also printed the board in 'glow in the dark' PLA. (Faberdashery PLA again).


So you can count things in the dark. the pegs don't glow though.


 The box I made is a simple plywood box, glued and nailed together.


The catch is a small one, I used this as the lid is very thin and I needed something that would fit on that lid. I original fitted a hook catch, but I'm not a big fan of those and fitted a chrome button type catch afterwards.


Inside the box there's two compartments, one fits the 8x8 board and one holds the pegs and the single hole board.


The bottom of the box is lined with crushed velvet and the outside of the box is painted with some blue paint I had.


Wednesday, 12 July 2017

Distance Increaser

When washing nappies in the toilet it's always nice to have a distance increaser, or, to give it it's Latin name: A Pair of Tongs.
They keep your hands away from the juice found in toilets and allow movement of nappies without the brown tipping of fingers.

These can be made out of wood, and when made quickly out of offcuts of wood and a homemade hinge (old PC case) they tend to be crap.

When remade (from the same materials) they can be a lot better.


Special slider that stops the ends from missing as the tongs twist:


DIY hinges as the hinge pot was empty (made from old PC case sheet material):


In between the wooden bits, there's a spring, held captive by the slider:


It works a lot better.

Wednesday, 1 February 2017

Moses Basket Stand

It looks like a Moses basket requires a stand, so, after perusal of a well known search engine, we have a design.


Some curvy wood.


And we have a stand. Some sewing required


Saturday, 10 December 2016

Equipment Rack

Equipment Rack

I now have quite a few instruments for electronics, some scopes a logic analyser and a thurlby multimeter/serial analyser/scope. the end of the workbench now has a gap after the shelves were built, and I was going to fill it in with a piece of worktop. Then I measured the instruments and found that they all fit in the gap. So, after a quick bit of wood bashing:


I have used some scrap wood and old flooring and made a simple rack for the equipment:


The rack is on wheels so can be moved about. I am hoping that the space freed up on the workbench will be more than I would have gained by filling the gap where the rack sits with more worktop. I think it will as I can have the logic analyser and scope next to something I'm working on and take up no bench space. We'll see.

As it's made of scrap wood, I could just dismantle it if it doesn't work out.